I used to delete half my vacation photos before I even got home.
Not because the places weren’t beautiful — they were stunning.
But because I looked like I was waiting for a dentist appointment in every single one.
Stiff arms.
Forced smile.
Standing dead center like a cardboard cutout in front of something amazing.
It wasn’t until a solo trip through the American Southwest that a stranger offered to take my photo and said, “Just walk toward me like you’re going somewhere.”
That one sentence changed everything.
Suddenly I looked like a person who actually lived travel, not just visited it.
These are my favorite poses and ideas that I’ve collected, tested, and genuinely used — the ones that make your shots feel alive.
The Walking Shot Is My All-Time Favorite Pose

Nothing looks more natural than a person in motion.
And yet, almost nobody uses this pose on vacation.
They just… stand there.
When I was hiking near Sedona, my buddy snapped a photo of me mid-stride on a red rock trail without even telling me.
It’s my most-liked travel photo to date.
You don’t need to pose at all — just walk at a normal pace, slightly away from or toward the camera.
Your arms swing naturally.
Your body has direction and energy.
And the background?
It suddenly becomes a scene, not just a backdrop.
My tip: tell your photographer to shoot in burst mode so they catch the perfect mid-step moment.
The one where both feet are slightly off the ground looks the most dynamic, trust me.
You can walk toward the camera, away from it, or across the frame from left to right.
Each version gives you a completely different vibe.
Toward = confident and approaching.
Away = mysterious and wandering.
Across = cinematic and editorial.
Try all three at every location and pick what feels right.
Looking Away From the Camera Hits Different
I know it sounds counterintuitive.

But some of my most scroll-stopping shots are the ones where I’m not looking at the lens at all.
There’s something about the gaze-away pose that feels honest.
Like you’re genuinely in the moment, not performing for it.
When I was in New Orleans last spring, I was leaning against a wrought iron fence, just looking down the street, coffee in hand.
My travel buddy caught that shot and I almost cried — it looked like a movie still.
The trick is giving your eyes something real to look at.
Don’t just stare blankly into the distance.
Look at an actual building, a food stand, the water — something that makes your expression react naturally.
Your eyes soften.
Your jaw relaxes.
And you stop looking like you’re trying to take a good photo, which is exactly when you take the best one.
Optional variation: pair this with a slight head tilt, like you’re genuinely curious about what you’re seeing.
It adds so much quiet personality to the shot.
The Sit-and-Explore Pose Makes Any Location Feel Cozy

Sometimes the best vacation photo is the one that looks like you just happened to sit down for a minute.
I love this one for cafes, viewpoints, beaches, and old town squares.
Sitting takes the pressure off your whole body.
Your shoulders drop.
Your legs find a natural position.
Your hands can hold something — a coffee cup, a map, your sunglasses — and suddenly you have a prop that grounds the whole image.
When I visited a little hilltop village in New Mexico, I sat on a low stone wall, looked out over the valley, and just… existed for a second.
My photographer friend snapped it without warning.
It’s warm, it’s real, and it doesn’t look staged at all.
My personal hack: always sit at a slight angle to the camera, never fully facing it head-on.
Even a 30-degree turn makes you look leaner, more relaxed, and way more interesting visually.
And lean forward slightly, elbows on knees — it gives you this thoughtful, explorer-on-a-break energy that I’m honestly obsessed with.
🗼 I Wrote a Book About My Japan Travel Catastrophes!
Before I landed in Tokyo, I thought I was the “Final Boss” of international travel. Spoiler alert: I WASN’T. 😅
🚅 I boarded the wrong Shinkansen and ended up in THE WRONG CITY. I confused locals with my “expert” bowing that was more awkward than accurate. I accidentally stumbled into a high-stakes Kendo practice thinking it was a tourist show. Sound like something you’d do?
“Things I Wish I Knew Before Going to Japan” is your shortcut to avoiding ALL my cringe-worthy mistakes. ✨ Inside, you’ll find practical, LIFE-SAVING tips on etiquette, transport, money, and hidden gems that will save you time, money, and a whole lot of confusion.
Use Your Hands — They Tell the Whole Story

Stiff hands ruin photos.
I cannot stress this enough.
When your hands are just hanging at your sides doing absolutely nothing, the whole photo feels frozen and awkward.
Give them a job.
Hold your hat against the wind.
Run your fingers along a textured wall.
Tuck one hand in your jacket pocket and let the other one gesture naturally.
When I was exploring a cobblestone market in Santa Fe, I was touching the edge of a hand-painted ceramic pot when someone snapped my photo.
I looked engaged, curious, present.
That photo felt like me more than any posed shot ever has.
My recommendation: if you’re not sure what to do with your hands, just interact with your environment.
Touch a railing.
Adjust your bag strap.
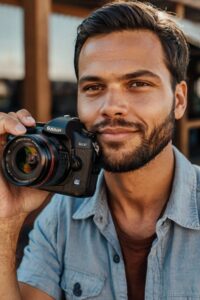
Hold your camera up like you’re about to shoot something yourself.
All of these look intentional and cool without requiring any posing skill at all.
And honestly?
The less you think about your hands, the better they look.
The Over-the-Shoulder Glance Is Effortlessly Cool

This one never gets old.
You walk a few steps ahead, then turn your head back over your shoulder — just barely — and that’s your shot.
It’s got this come along with me energy that I find magnetic in travel photography.
The thing that makes it work is the body language.
Your body is moving forward — committed to wherever you’re going.
But your glance back says, “You seeing this?
Isn’t this incredible?”
And it pulls the viewer right into the story with you.
I use this pose on bridges, alleyways, jungle paths, airport terminals — anywhere there’s a strong leading line behind me.
The environment does half the work.
My tip: don’t fully turn your body, just your head and maybe one shoulder.
The contrast between your forward-moving body and your backward glance is what creates the visual tension.
Also, let one arm swing back slightly as you turn.
It breaks up the silhouette and makes the whole thing look more dynamic and alive.
Lean Into Something — A Wall, a Pillar, a Tree

Leaning is criminally underused as a travel pose.
And I don’t mean the awkward “I don’t know what to do so I’ll touch this wall” lean.
I mean the relaxed, confident, I own this moment lean.
There’s a huge difference.
The first one looks uncomfortable.
The second one looks like a magazine cover.
When I was in Austin at this incredible mural wall, I leaned back against it, crossed one ankle over the other, and shoved my hands in my pockets.
It was one of those shots I didn’t even plan — and it turned into my profile photo for months.
The rule I follow: lean with your back or shoulder, not your whole body weight.
Keep one leg straight and one slightly bent.
That slight asymmetry is what gives the pose life.
And choose your leaning surface intentionally.
A painted wall, a rustic door, a massive tree trunk, an old train car — the texture and color behind you become part of the story.
Capture Yourself Doing Something Real

The most powerful vacation photos I’ve ever taken aren’t poses at all.
They’re moments.
Me actually reading the menu at a taco stand.
Me genuinely laughing at something my friend said on a kayak.
Me studying a trail map at a trailhead, slightly squinting in the sun.
These feel so much more real than any “okay, now smile” moment — because they are.
My tip for getting these shots: ask your travel buddy to just keep their phone out and shoot candid bursts while you’re actually doing things.
Don’t try to act natural.
Just be natural.
You order your food, you look at the view, you wipe sweat off your forehead after a long hike — those are the shots.
The emotional reason this works so well: viewers connect with authenticity.
They see themselves in you.
They feel the heat of that afternoon or the exhaustion after that climb.
And that connection is way more powerful than any perfectly staged pose ever could be.
The Horizon Stare — Simple, Dramatic, Always Works

Stand at the edge of something vast.
An ocean.
A canyon.
A mountain range.
A long desert highway.
Face it — not the camera.
Let the scale of the world dwarf you just a little.
And let someone capture that from behind or slightly to the side.
This is my favorite pose for epic landscapes because it does something emotionally true: it shows how small we are in the best possible way.
There’s something about a person standing at the edge of something massive that gives me chills every single time.
It communicates awe, adventure, freedom — all without saying a single word.
When I was at the rim of Bryce Canyon at golden hour, my buddy shot me from about twenty feet back, just standing there, looking out.
The colors were unreal.
The scale was humbling.
And I was just… a tiny human silhouette in it all.
That photo makes my chest feel full every time I look at it.
My tip: don’t stand perfectly centered in the frame.
Shift slightly to the left or right third of the image.
It leaves visual breathing room and makes the landscape feel even more expansive.
Get Low or Go High — Change Your Angle Completely

Most vacation photos are taken from eye level.
And most vacation photos look the same.
One of the best moves I ever made was just telling my photographer to change their angle.
Get low and shoot up at me against the sky — suddenly I look taller, bolder, more heroic against that blue canvas.
Or go high — stand on a ledge, use a second floor balcony, find a hill — and shoot down at me in a square, a market, a garden.
From above, you get context.
You get texture.
You get the whole environment at once.
I tested this in a colorful street market in Albuquerque.
From eye level, I was just a guy in a crowd.
From a second-floor railing looking down?
I was a traveler immersed in culture, surrounded by color and life.
Same moment.
Completely different story.
My hack: always scout your location for elevated spots before you start shooting.
A staircase landing, a parking structure ramp, even a park bench your photographer can stand on — these small height changes make a massive difference.
🗼 I Wrote a Book About My Japan Travel Catastrophes!
Before I landed in Tokyo, I thought I was the “Final Boss” of international travel. Spoiler alert: I WASN’T. 😅
🚅 I boarded the wrong Shinkansen and ended up in THE WRONG CITY. I confused locals with my “expert” bowing that was more awkward than accurate. I accidentally stumbled into a high-stakes Kendo practice thinking it was a tourist show. Sound like something you’d do?
“Things I Wish I Knew Before Going to Japan” is your shortcut to avoiding ALL my cringe-worthy mistakes. ✨ Inside, you’ll find practical, LIFE-SAVING tips on etiquette, transport, money, and hidden gems that will save you time, money, and a whole lot of confusion.
The Jacket-Over-Shoulder Move Is a Classic for a Reason

I’ll be honest — I resisted this one for a long time.
It felt too stylized.
Too deliberate.
But then I tried it on a breezy evening walk along the San Antonio Riverwalk, jacket casually slung over one shoulder, and I genuinely loved how it turned out.
It works because it signals something emotional: you’re relaxed.
The day is winding down.
You’re comfortable enough to shed a layer.
You’re present in the moment, not rushing anywhere.
It has this golden-hour-stroll energy that I find really warm and appealing.
My tip: hook the jacket on just two or three fingers, not your whole fist.
It hangs more naturally and looks more effortless.
And walk while holding it — a walking jacket-over-shoulder shot is so much better than a standing one.
Optional variation: try it with a flannel shirt or a light hoodie instead of a jacket.
It gives a more casual, rugged vibe that works really well for outdoor and national park settings.
Use Reflections to Double Your Shot’s Visual Impact
Puddles.
Windows.
Mirrors.
Sunglasses.
Calm water.

These are your secret weapons.
A reflection shot takes a single good moment and turns it into something almost surreal.
I discovered this accidentally in Portland after a rainstorm.
There was a huge puddle on a brick street, and I stepped around the edge of it — then stopped when I saw the whole city reflected in it perfectly.
My buddy shot me crouching down next to it, looking at my own reflection.
It was moody, it was cool, and it looked like way more effort than it actually was.
The trick is getting the camera low — almost at puddle level — so the reflection fills the bottom half of the frame and you fill the top.
You end up with this gorgeous symmetry that feels artistic without needing any editing tricks.
Window reflections work great too.
Stand near a large storefront glass and have your photographer shoot from the side at an angle — you’ll get both the real you and the ghost version of you in the window, with the interior of the shop behind you.
It’s layered, complex, and genuinely beautiful.
The “Just Arrived” Energy Shot

You know that feeling the second you step somewhere new?
That mix of tired and wired and holy cow, I’m actually here?
I want that in my photos.
And you can actually capture it if you move fast when you first arrive somewhere.
The moment you drop your bag at the hotel and step out onto the balcony for the first time.
The second you round a corner and see a view you weren’t expecting.
The look on your face when the food hits the table and it’s even better than you hoped.
These micro-moments of genuine reaction are pure gold.
My hack: keep your camera ready during the first ten minutes at any new location.
Don’t put it away.
Don’t get settled first.
Shoot during the arrival, not after.
The light is usually the same — but your expression is completely different.
You’re not yet used to the place.
Your eyes are still wide.
Your body language is open and curious and alive.
And that energy — that raw, fresh, I can’t believe I’m here energy — is something no staged pose can fake.
Golden Hour Makes Every Pose Ten Times Better

I’m not exaggerating.
I’ve taken the exact same pose in the same location at noon and at golden hour, and they look like completely different photos.
Golden hour — that window just after sunrise or just before sunset — wraps everything in this warm, amber, slightly hazy light that makes skin glow and shadows go soft.
Every pose I’ve talked about looks better in it.
The walking shot gets a long dramatic shadow stretching behind you.
The horizon stare turns into something cinematic and glowing.
The lean against a wall becomes this gorgeous portrait with warm bokeh in the background.
My personal rule: no matter where I am, I plan at least one photo session around golden hour.
I’ll figure out which direction the light is coming from and position myself so it hits my face from the side or slightly from behind.
Side lighting gives dimension and depth.
Backlighting gives that glowing outline effect that looks almost ethereal.
And honestly?
You don’t need a fancy camera.
Golden hour light is so forgiving and beautiful that a phone camera shot in that window can outperform a DSLR shot at high noon.
That warm glow does more for your travel photos than any filter ever will.