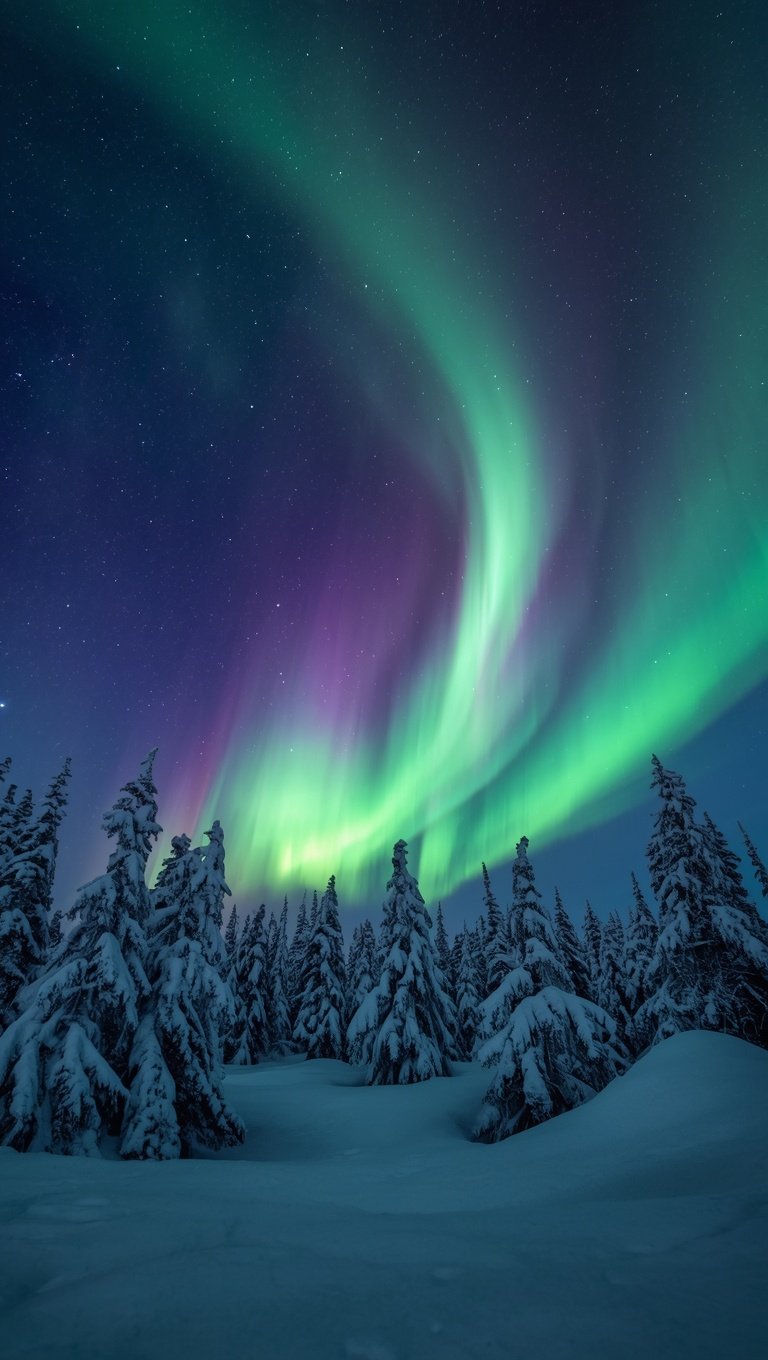

I almost missed the best aurora of my life because I was staring at a screen instead of the sky.
It was in Tromsø, three years back, twenty below, fingers half frozen around a camera I barely knew how to use.
The lights went green, then this wild ribbon of purple showed up, and I was so busy fumbling with settings that my buddy had to grab my shoulder and say, “Jeff, look up.”
That moment kind of changed how I do this whole thing now.
So here’s what I’ve learned since then, the stuff that actually works, and the mistakes that cost me shots I’ll never get back.
You don’t have to choose between a good photo and a good memory.
But you do have to know what you’re doing before you’re standing in the cold trying to figure it out.
Why I Almost Gave Up Shooting the Aurora Entirely

That first night in Norway humbled me fast.
I’d read a bunch of guides beforehand and still felt completely lost once the sky actually lit up.
My hands were shaking from the cold, not excitement, and I couldn’t remember a single setting I’d practiced at home.
So I got maybe four usable frames out of ninety minutes of shooting, and I spent most of that time frustrated instead of amazed.
Here’s the thing nobody tells you.
The aurora doesn’t wait for you to get comfortable.
It shows up, it shifts, and sometimes it’s gone in ten minutes.
If you’re still learning your camera in that moment, you’ve already lost.
So my first real piece of advice is boring but true: practice your settings at home, in the dark, with gloves on, before you ever leave for a trip.
I literally stood in my backyard on a clear night just to get muscle memory for adjusting ISO blind.
Felt ridiculous.
Worked like a charm.
By my second trip to Iceland, I wasn’t thinking about buttons anymore.
I was just watching, and that’s when the photos actually got good, because I wasn’t fighting my gear anymore.
The Gear That Actually Matters (And What’s Just Extra Weight)

You do not need to spend a fortune on this.
I made that mistake early, buying gear I barely used because some gear list online told me I had to.
Here’s what actually earns its space in your bag.
A camera that shoots manual mode, full stop.
Doesn’t have to be top of the line, mine’s a few years old now and still gets the job done.
A sturdy tripod is non-negotiable, and I mean sturdy, not the flimsy travel kind that wobbles in a light breeze.
I learned that one the hard way in Alaska when wind gusts blurred half my shots.
A wide-angle lens helps a ton, something in the 14-24mm range if you can swing it.
And a lens with a wide aperture, f/2.8 or lower, makes a real difference in low light.
Extra batteries are essential because cold drains them fast, way faster than you’d expect.
I keep spares in an inside jacket pocket, close to my body heat.
A headlamp with a red light setting saves your night vision and your dignity when you’re fumbling with gear.
Optional but nice: a remote shutter release, though your camera’s timer function works fine in a pinch.
Everything else is honestly just extra weight you’ll regret carrying.
Getting Your Camera Settings Right Before the Sky Lights Up

Manual mode is your friend here, even if it feels intimidating at first.
Start with your ISO somewhere between 800 and 3200, depending on how bright the display is.
Faint aurora needs a higher ISO, bright dancing aurora can actually handle a lower one.
Your aperture should be as wide open as your lens allows, so f/2.8 or lower if you’ve got it.
Shutter speed is where people mess up the most, and I did too.
For faint, slow-moving aurora, try 10 to 15 seconds.
But if the lights are moving fast, dropping to 4 or 5 seconds keeps that ribbon-like detail instead of a green blur.
Focus manually, always, set to infinity or just short of it.
Autofocus basically panics in the dark and hunts forever, wasting time you don’t have.
I focus on a distant light or star beforehand, then switch to manual and tape the focus ring so it doesn’t shift.
Shoot in RAW format, not JPEG, because you’ll want that flexibility when editing later.
And take a test shot the second you set up, then adjust from there instead of guessing blind.
Small tweaks make a big difference, so don’t be afraid to keep adjusting between bursts.
🗼 I Wrote a Book About My Japan Travel Catastrophes!
Before I landed in Tokyo, I thought I was the “Final Boss” of international travel. Spoiler alert: I WASN’T. 😅
🚅 I boarded the wrong Shinkansen and ended up in THE WRONG CITY. I confused locals with my “expert” bowing that was more awkward than accurate. I accidentally stumbled into a high-stakes Kendo practice thinking it was a tourist show. Sound like something you’d do?
“Things I Wish I Knew Before Going to Japan” is your shortcut to avoiding ALL my cringe-worthy mistakes. ✨ Inside, you’ll find practical, LIFE-SAVING tips on etiquette, transport, money, and hidden gems that will save you time, money, and a whole lot of confusion.
Finding a Tripod Setup That Won’t Let You Down

I used to think any tripod would do the job, and then Alaska taught me otherwise.
Wind out there is no joke, and a flimsy tripod turns your fifteen-second exposure into a blurry mess.
So invest in something with real weight and stability, even if it means carrying a few extra pounds.
I hang my camera bag from the center hook of my tripod now, adds stability instantly.
That trick alone saved me on a windy night in the Lofoten Islands.
Set your tripod low and wide if conditions are rough, it lowers your center of gravity.
Avoid extending the center column all the way up unless you have to, it’s the wobbliest part.
If you’re on snow or ice, push the legs in firmly and let them settle before shooting.
I’ve had a leg sink unevenly mid-shoot and thrown off an entire exposure.
Now I always do a little wiggle test before I trust it.
A cheap tripod is genuinely one of the worst places to cut corners on this kind of trip.
You’re already dealing with cold hands and low light, don’t add a shaky base to the list of problems.
Spend the money here if you spend it anywhere.
Scouting Your Location Before Darkness Falls

Showing up somewhere random after dark and hoping for the best rarely works out.
I always scout my spot in daylight now, even if it means an extra afternoon drive.
You want minimal light pollution, obviously, but also something interesting in the foreground.
A lake for reflections, an old cabin, some jagged mountains, anything that gives the shot a sense of place.
My favorite frame from Iceland has an abandoned fishing boat in the foreground, and honestly the aurora is almost secondary in that photo.
Check for safety too, because wandering unfamiliar terrain in pitch darkness isn’t smart.
I mark my exact spot on my phone’s map during the day so I’m not stumbling around later.
North-facing views tend to be your best bet, since that’s usually where the aurora shows up strongest.
But don’t ignore the whole sky, because sometimes it wraps completely overhead and surprises you.
If you’re near a town, drive at least twenty minutes out to cut down on ambient light.
I’ve wasted nights shooting too close to civilization and gotten washed-out, disappointing frames.
Give yourself the best possible canvas before you even think about camera settings.
The location does half the work if you pick it right.
Reading the Forecast Instead of Just Hoping

I used to just show up and hope, and that’s a rookie move.
Now I check aurora forecast apps religiously before planning any night out.
Kp index matters, sure, but I’ve seen a Kp of 3 blow me away and a Kp of 6 fizzle into nothing.
Cloud cover is honestly the bigger factor most nights.
You could have a massive geomagnetic storm happening above a thick layer of clouds and see absolutely nothing.
So I check cloud forecasts just as closely as aurora activity itself.
Solar wind speed and density are worth glancing at too, if you want to get a little nerdy about it.
I like apps that send push notifications when activity spikes, saves me from staring at my phone all night.
But here’s my honest take: forecasts are a guide, not a guarantee.
Some of my best nights came from forecasts that looked mediocre on paper.
And some hyped-up nights turned out totally quiet.
So build flexibility into your trip, extra nights if you can swing it.
I always tell people planning a trip around this to book at least three or four nights, not just one.
Because one clear night against bad odds beats zero clear nights against great odds.
Dressing So You Can Actually Stay Out Long Enough

Cold ends aurora hunts faster than clouds do, in my experience.
I’ve cut shoots short simply because I couldn’t feel my fingers anymore.
Layering is everything, and I mean real layering, not just a heavy coat over a t-shirt.
Base layer, insulating layer, windproof outer shell, that’s the formula that’s kept me out there for hours.
Your feet matter more than people think, so wool socks and insulated boots are worth the investment.
I learned that lesson shivering in regular sneakers in Finland, never again.
Hand warmers are a small purchase that make a massive difference, I toss a few in my gloves and boots both.
Speaking of gloves, get a pair thin enough to operate camera buttons but warm enough to actually protect you.
I use a glove liner under a thicker mitten I can quickly pull off for adjustments.
A warm hat that covers your ears is non-negotiable, heat escapes fast from your head.
And bring a thermos of something hot, coffee or cocoa, it genuinely helps morale during the slow waiting periods.
Standing around in freezing temps for an hour with nothing happening tests your patience.
Being warm enough to actually enjoy that waiting makes the whole trip better.
Shooting the Aurora on Just Your Phone

Not everyone travels with a full camera setup, and that’s completely fine.
Modern phones have gotten shockingly good at this, way better than a few years ago.
Most newer phones have a night mode that can pick up aurora if it’s decently bright.
Turn off flash immediately, obviously, and prop your phone against something stable since handheld won’t cut it.
A small flexible tripod works great for phones and takes up almost no space in a bag.
If your phone allows manual controls, drop the shutter speed down and bump exposure time as long as it’ll allow.
Some apps let you shoot RAW on your phone too, giving you more room to edit afterward.
Keep your phone warm between shots, cold drains phone batteries even faster than camera batteries.
I tuck mine inside my jacket between shots and it makes a noticeable difference.
Wipe your lens often, condensation sneaks up on you in cold air more than you’d think.
Don’t expect phone shots to match a dedicated camera, but honestly, some of them still blow me away.
I’ve seen phone shots from friends that genuinely rival what I got with thousands of dollars of gear.
So don’t let not having fancy equipment stop you from trying.
Building a Composition That Doesn’t Feel Empty

A sky full of green lights with nothing else in frame gets old fast.
The photos that actually stop people scrolling have something grounding them.
A person standing there, a mountain silhouette, a tree line, even just a rocky shoreline.
I always try to include a human element when I can, it adds scale and a sense of wonder.
My favorite shot from Norway has my buddy standing with his hands in his pockets, just looking up.
It tells a story instead of just documenting a phenomenon.
Rule of thirds still applies here, don’t center everything dead in the middle.
Leave room for the aurora to breathe across the frame instead of cramming it into one corner.
Reflections in water genuinely double the drama of a shot, so I hunt for still lakes whenever I can.
Leading lines work too, a road, a fence line, a river, anything guiding the eye through the frame.
Don’t be afraid of negative space either, sometimes a small amount of aurora against a huge dark sky feels more powerful than a sky bursting with color.
I’ve learned that less can genuinely be more here.
Take your time setting up composition before the lights peak, because once they’re dancing, you won’t have time to think.
🗼 I Wrote a Book About My Japan Travel Catastrophes!
Before I landed in Tokyo, I thought I was the “Final Boss” of international travel. Spoiler alert: I WASN’T. 😅
🚅 I boarded the wrong Shinkansen and ended up in THE WRONG CITY. I confused locals with my “expert” bowing that was more awkward than accurate. I accidentally stumbled into a high-stakes Kendo practice thinking it was a tourist show. Sound like something you’d do?
“Things I Wish I Knew Before Going to Japan” is your shortcut to avoiding ALL my cringe-worthy mistakes. ✨ Inside, you’ll find practical, LIFE-SAVING tips on etiquette, transport, money, and hidden gems that will save you time, money, and a whole lot of confusion.
Mistakes I Made So You Don’t Have To

I showed up without a spare battery once and lost shooting time mid-peak while it charged in my car.
Lesson learned, always carry backups.
I focused on autofocus one night out of habit and ended up with a whole memory card of blurry frames.
Devastating in the moment, honestly.
I underdressed thinking I’d “tough it out” and ended up cutting a promising night short after forty minutes.
Never again, my comfort directly affects how long I can actually shoot.
I forgot to check my horizon line and got home to discover every shot was slightly tilted.
Small thing, annoying fix in editing, easily avoided.
I chased the “perfect” spot too hard one trip and drove around wasting prime aurora time instead of just setting up somewhere decent.
Sometimes good enough right now beats perfect twenty minutes from now.
I didn’t bring gloves thin enough to work my camera and missed adjusting settings during a rapidly changing display.
Test your gear with your actual gloves before the trip, not during it.
I also used to obsess over getting it perfect instead of just watching for a minute, and that’s the mistake that actually hurt the most looking back.
Editing Without Making It Look Fake

I keep my edits pretty light, honestly, because I want it to look like what I actually saw.
Boosting contrast slightly brings out the structure in the aurora without going overboard.
I nudge the white balance a touch cooler sometimes, since aurora can pick up a slight color cast depending on your camera.
Reducing noise carefully matters too, since high ISO shots can get grainy, but don’t overdo it or you’ll lose detail in the lights themselves.
I bump clarity just a little to bring out the texture in the ribbons and curtains of color.
Saturation is where people go overboard, and I get it, the temptation is real.
But cranking it too far makes the whole photo look cartoonish instead of magical.
I always compare my edit against my memory of the actual night, if it feels exaggerated, I pull it back.
Cropping helps sometimes too, tightening up a composition that felt a little loose in the moment.
I also fix that tilted horizon issue I mentioned earlier, a quick straighten tool does wonders.
Keep a few unedited versions too, they’re kind of fun to look back on and see how far you’ve come.
Editing should enhance the feeling, not replace it with something that never actually happened.
Knowing When to Put the Camera Down

This one might be the most important thing I’ll say in this whole post.
There’s a real temptation to shoot the entire display from start to finish, chasing every shift and color change.
But some of my favorite aurora memories have almost no photos attached to them at all.
I remember one night in Iceland where I put my camera down for a solid twenty minutes just to actually watch.
My neck craned back, my breath visible in the cold air, completely silent except for the wind.
That memory means more to me than half the photos I’ve ever taken.
So my honest advice is to get your shots early, nail your settings, and then give yourself permission to just experience it.
Set an intention beforehand, something like “I’ll shoot for the first thirty minutes, then just watch.”
It sounds simple, but in the moment it’s genuinely hard to put the camera down.
The aurora is rare and unpredictable, and that scarcity makes you want to capture every second.
But a photo can’t hold the way the cold air feels against your face while green light moves overhead.
Only your memory can hold that.
Balance the two, and you’ll walk away with both a great photo and a moment you actually lived through.
Traveling With Others Who Want In on the Photos Too

Shooting alongside a partner or friends changes the dynamic a bit, and honestly, I like it more this way now.
Someone can hold a flashlight steady while you compose a shot in total darkness.
Someone else can act as your foreground subject, adding that human element I mentioned earlier.
I’ve gotten some of my favorite shots because my wife just happened to be standing in frame, hands raised, looking up in genuine awe.
That wasn’t staged, and you can tell, and that’s exactly why it works so well.
If you’re traveling with kids, keep expectations realistic, cold nights and waiting periods test young patience fast.
Bring snacks, keep sessions shorter, and let them experience wonder without forcing them to sit still for an hour.
Coordinate with your group beforehand about who wants photos versus who just wants to watch, it avoids frustration later.
I’ve been on trips where mismatched expectations made for a slightly tense night, nobody’s fault, just miscommunication.
A quick conversation before heading out solves that easily.
Share gear if you need to, one solid tripod setup can serve a small group taking turns.
And honestly, some of the best trip memories come from the in-between moments, laughing in the cold, passing a thermos around, waiting together for the sky to do something incredible.