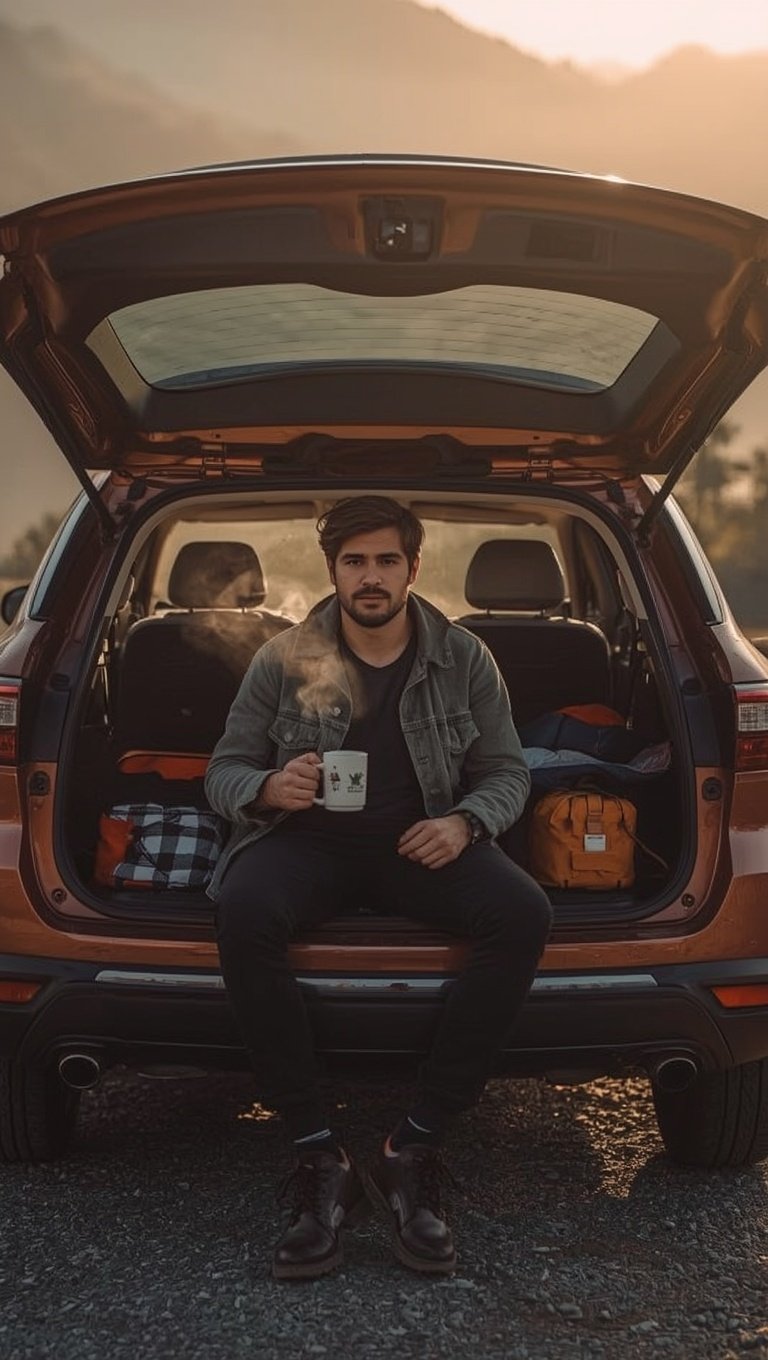

I used to fight my tent at eleven at night, in the wind, with a headlamp in my mouth.
That was the last straw for me.
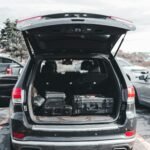
The next trip, I folded down my back seats, tossed a sleeping pad in the trunk, and never set up a tent stake again.
Something shifted that night.
I slept better in the back of my own car than I ever had on a $300 tent setup.
So if you’re tired of wrestling poles in the dark, or you just want mornings that start with coffee instead of a fight against nylon, I get it.
This is everything I’ve learned about turning your own vehicle into the coziest, simplest basecamp you’ve ever had.
The Flat Platform Bed Build


The first thing that changed my whole setup was a flat platform bed.
I built mine out of half-inch plywood, cut to fit right over my folded seats.
It sounds simple, and honestly, it is.
But that flat surface is the difference between tossing and turning all night and actually sleeping.
When I built my first one, I used leftover wood from a garage project and just eyeballed the cuts.
It wasn’t pretty.
But it worked, and that’s kind of the whole point.
You don’t need a woodshop or a hundred bucks in hardware.
A few boards, some basic supports, and you’ve got yourself a bed frame that turns your trunk into a bedroom.
I’ve since upgraded to one with built-in storage underneath, and I’m obsessed with how much gear fits down there.
My tip: leave at least four inches of clearance under the platform for bins.
You’ll want somewhere to stash boots, cooking gear, and the stuff you don’t want rolling around at 2 a.m.
And if you’re short on time, some outdoor brands sell pre-cut platform kits that bolt right in.
Either way works.
The goal is just one flat, solid surface where your sleeping pad won’t slide into a seatbelt buckle at midnight.
Blackout Window Covers

I didn’t think window covers mattered until my first summer trip without them.
The sun came up at five thirty, and so did I, whether I wanted to or not.
Now blackout covers are non-negotiable for me.
I use a set of reflective, foam-backed panels custom cut for my windows, and they suction right into place.
The difference is honestly kind of wild.
It goes from a fishbowl to a cave in about ninety seconds.
And there’s a privacy side to this too, which matters more than people admit.
You’re sleeping in a parking area, a trailhead, or a quiet pullout, and you want to feel tucked away, not on display.
If I had to start from scratch, I’d probably go with reflective bubble insulation from the hardware store and cut my own panels first, just to test the fit.
It’s cheap, and it works almost as well as the fancy kits.
My honest tip: label each panel for its specific window.
Mine are all slightly different shapes, and fumbling with them at night in the cold is not fun.
Get this right once, and every single night after feels effortless.
Layering Your Sleep System

This is the part people skip, and it’s the part that actually matters most.
A sleeping bag alone on a hard platform is a rough night, trust me.
I learned this the hard way on a fall trip in the mountains, where I woke up freezing despite a bag rated well below the temperature outside.
The cold wasn’t coming from the air.
It was coming up through the floor.
So now I layer it like this: a foam pad first, then an inflatable pad on top, then my bag, then a fleece blanket over everything.
That foam base insulates against the cold metal and wood underneath you.
It’s a small thing that makes a massive difference.
I also keep a wool blanket in the car year-round, even in summer, because nights can turn on you fast.
If you run cold like I do, a hot water bottle tossed into the footbox before you climb in is kind of a secret weapon.
Sounds old-fashioned, but it works so well.
Optional upgrade: an electric heated blanket that runs off a portable power station.
I used mine on a January trip and honestly slept better than I do at home.
Layer it right, and the tent-versus-no-tent debate stops mattering at all.

🗼 I Wrote a Book About My Japan Travel Catastrophes!
Before I landed in Tokyo, I thought I was the “Final Boss” of international travel. Spoiler alert: I WASN’T. 😅
🚅 I boarded the wrong Shinkansen and ended up in THE WRONG CITY. I confused locals with my “expert” bowing that was more awkward than accurate. I accidentally stumbled into a high-stakes Kendo practice thinking it was a tourist show. Sound like something you’d do?
“Things I Wish I Knew Before Going to Japan” is your shortcut to avoiding ALL my cringe-worthy mistakes. ✨ Inside, you’ll find practical, LIFE-SAVING tips on etiquette, transport, money, and hidden gems that will save you time, money, and a whole lot of confusion.
Truck Bed Camper Shell Setup

If you drive a truck, a camper shell might be the single best upgrade you make.
Mine turned an open bed into a fully enclosed little room in one weekend.
I went with a basic aluminum shell, nothing fancy, and added a foam mattress that fits the bed dimensions exactly.
The headroom surprised me.
I can sit up, change clothes, and even cook on a small stove with the tailgate down for ventilation.
There’s something about a hard-sided shell that just feels more secure than fabric ever did.
Rain doesn’t scare me anymore.
Neither does wind.
I’ve ridden out a genuinely nasty storm in mine, dry and cozy, while I watched a nearby tent basically collapse.
My favorite addition has been battery-powered string lights clipped along the frame.
It sounds small, but warm light inside a shell makes it feel like an actual room instead of a storage box.
Variation to consider: a pop-up shell if you want standing height, though it does add weight and cost.
I stuck with the low-profile version because I liked how it kept my gas mileage close to normal.
Either way, once you go hard-sided, it’s tough to imagine going back to fabric walls.
Minivan Stealth Camping

Minivans get overlooked, and that’s honestly a mistake.
I borrowed a friend’s minivan for a week-long trip and came home a total convert.
The flat floor space once you fold the seats is enormous, way more than most SUVs offer.
And here’s the part I really loved: from the outside, it just looks like a parked minivan.
Nobody looks twice.
That kind of stealth camping is huge if you’re staying in city pullouts or rest stops between longer legs of a trip.
I curtained off the windows with simple magnetic sunshades, the cheap kind parents use for kids.
Worked perfectly, and cost about fifteen bucks total.
The sliding doors are another underrated feature, since you get easy access from both sides without climbing over gear.
My tip here is to test your bed length before you commit to a build.
Some minivan models have wheel wells that cut into your sleeping space more than you’d expect.
I measured mine with a tape measure and a notepad before cutting any wood, and I’m glad I did.
Portable Power Stations

A portable power station changed how I think about car camping completely.
Mine runs my heated blanket, charges my phone and camera batteries, and powers a small fan on hot nights.
I didn’t realize how much I’d use it until I had one.
Before that, I was rationing my car battery and worrying about dead-battery mornings in the middle of nowhere.
Now I just plug in and forget about it.
I charge mine at home before a trip, and I top it off with a small solar panel if I’m out for more than a few days.
That combination has kept me powered through week-long trips without ever needing an outlet.
My honest recommendation: get one with enough capacity to run a portable fridge, because that single addition upgraded my meals more than anything else on this list.
Cold drinks and fresh food instead of soggy cooler ice.
It’s a small luxury that feels enormous after a long day on the trail.
Optional variation: a smaller, lighter power station if you’re only charging phones and lights, since the big units add real weight and cost.
Either way, this is one purchase I’d make again in a heartbeat.
Cooking Setup Outside the Car

Cooking inside your vehicle is a hard pass for me, every time.
Condensation, smells, and carbon monoxide risk just aren’t worth it.
Instead, I built a simple tailgate kitchen using a fold-out table and a two-burner propane stove.
It sets up in under five minutes now that I’ve done it enough times.
I keep my cooking gear in one dedicated bin, so nothing gets left behind or buried under sleeping bags.
That single habit saved me from more than one dinner disaster.
My go-to setup includes a cast iron skillet, a single pot, and a French press, because good coffee in the morning genuinely changes my whole outlook on a trip.
There’s something about steam rising off a camp stove while the sun comes up that no drive-through can replace.
I season that skillet like it’s an heirloom at this point.
For rainy trips, I added a small awning that clips onto my roof rack, giving me dry cooking space even in a downpour.
That upgrade alone has saved multiple meals.
Tip: pack spices in a small labeled container instead of full bottles, because trunk space disappears fast once food gear gets involved.
Drawer and Storage Systems

Storage is where a lot of tent-free setups either shine or fall completely apart.
I learned this after spending an entire trip digging through loose bags looking for a can opener.
Never again.
Now I run a simple drawer system built into the platform bed, with everything sorted into labeled bins.
Kitchen stuff in one, clothes in another, tools and recovery gear in a third.
It sounds a little obsessive, but it saves so much time and frustration once you’re actually out there.
I built mine from plywood and drawer slides I found secondhand, which kept the whole project under a hundred dollars.
If building isn’t your thing, modular plastic bins that slide under a platform work almost as well.
The key is consistency, so you always know exactly where things live.
My favorite hack: velcro strips on the drawer bottoms to keep bins from sliding around on rough roads.
Cheap, and it works shockingly well.
Optional upgrade: a slide-out kitchen drawer that pulls out from the trunk, giving you a stove platform without setting anything on the ground.
I added one last year, and it’s genuinely one of my favorite parts of the whole build.
Cooler and Fridge Setup

Food quality is where a lot of tent-free setups quietly fall apart, and it doesn’t have to.
I used a basic cooler for years, constantly buying ice and dealing with soggy food by day three.
Switching to a portable 12-volt fridge was one of the best upgrades I’ve made, full stop.
It runs off my power station, keeps things at an actual set temperature, and never needs ice again.
Cold drinks at the end of a hot hiking day feel like an incredible luxury out there.
I keep mine stocked with basics like eggs, cheese, and pre-made meals I prep before leaving home.
That prep step alone has upgraded my meals more than any fancy stove ever could.
My honest tip: separate your fridge into zones, drinks on one side, actual food on the other, so you’re not digging through everything every time you grab water.
Optional variation: a smaller 12-liter fridge if you’re tight on space or traveling solo, since the bigger units do draw more power and take up real room.
Either size beats a leaky cooler and warm sandwiches every single time.